
Introduction
Teen bedrooms deserve to reflect evolving personalities and interests without requiring massive budgets or professional designers. The best teen bedroom DIY decor ideas combine creative expression with practical space solutions, especially crucial in smaller rooms where every inch counts. From Instagram-worthy wall treatments to clever storage hacks, these hands-on projects empower teens to personalize their spaces while developing valuable skills. Whether your teen’s style leans minimalist, boho, maximalist, or constantly changing, these affordable DIY ideas transform small bedrooms into functional, stylish retreats that grow with them through their teenage years.
1. Create a Photo Clip Wall With String Lights
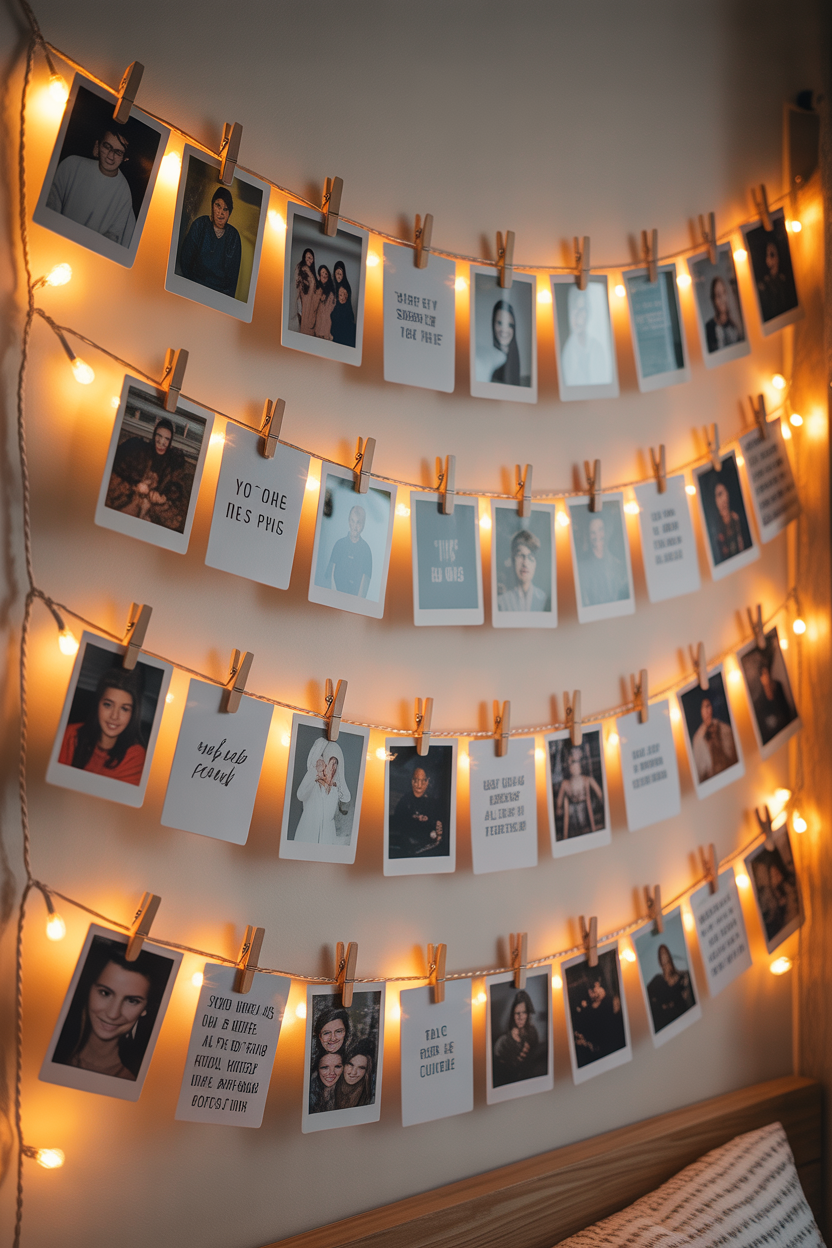
Photo clip walls combine functional lighting with personal expression, creating Instagram-worthy displays that cost minimal money while delivering maximum impact. String lights provide the foundation—LED versions stay cool and use minimal electricity—while small clips allow constant rotation of photos, artwork, concert tickets, and inspirational quotes. This flexible display system adapts as teens’ interests evolve, requiring no permanent wall damage beyond small adhesive hooks. The warm glow creates perfect ambient lighting for video calls, studying, or relaxing.
Installation takes under an hour using adhesive Command hooks or small nails to hang lights in horizontal rows spaced 8-12 inches apart. Choose warm white LEDs for flattering light, or multi-color versions for more playful aesthetics. Attach mini wooden clothespins, metal clips, or decorative binder clips every 6-8 inches along the wires. Print favorite Instagram photos, create inspirational quote cards, display concert memories, or rotate seasonal themes. The constantly changing gallery keeps the room feeling fresh while the lights serve double duty as task lighting and mood setting. This affordable project—under $20 for lights and clips—creates major visual impact in small spaces where wall art might overwhelm.
2. Build Floating Corner Shelves for Vertical Storage
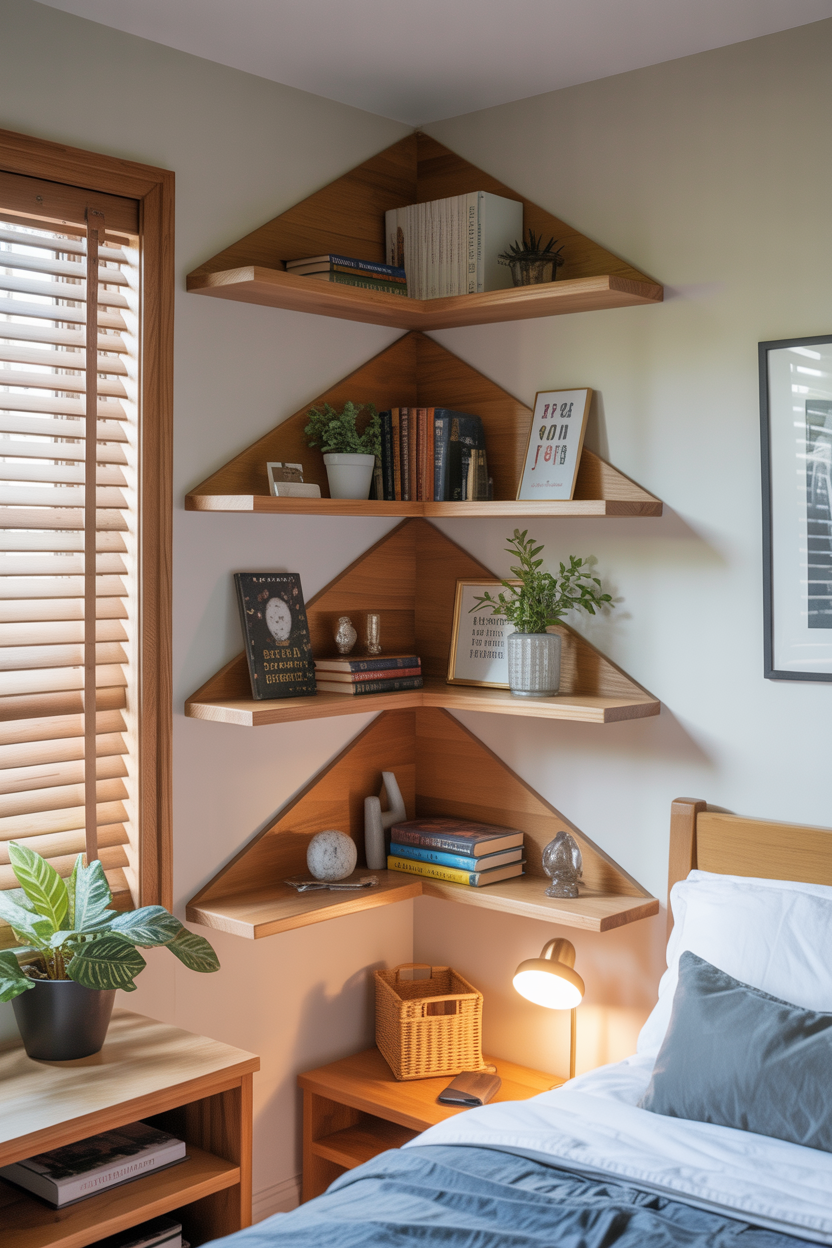
Corner spaces often go unused in small bedrooms, making floating corner shelves brilliant space-maximizing solutions that add storage and display without consuming floor area. These triangular shelves tuck into corners where standard furniture won’t fit, creating homes for books, plants, photos, and collections. Building them yourself allows customization for exact dimensions and finish preferences while costing a fraction of purchased versions. The floating design maintains clean, modern aesthetics crucial in preventing small spaces from feeling cluttered.
Construct corner shelves from solid wood boards or quality plywood cut into right triangles with 8-12 inch legs depending on desired size. Sand thoroughly and finish with stain, paint, or clear sealer matching room décor. Install using L-brackets hidden underneath, floating shelf hardware, or simple corner braces depending on weight requirements and desired aesthetic. Stagger multiple shelves at varying heights—typically 12-18 inches apart—for maximum storage without overwhelming the corner. Display a mix of functional and decorative items: textbooks and favorites, small plants, picture frames, collected objects, or beauty products. The vertical storage approach capitalizes on often-wasted corner space while keeping floors clear, essential for maintaining openness in compact teen bedrooms.
View morehttps://dreamgardenspk.com/blog/
3. Design a Custom Pegboard Organization Wall
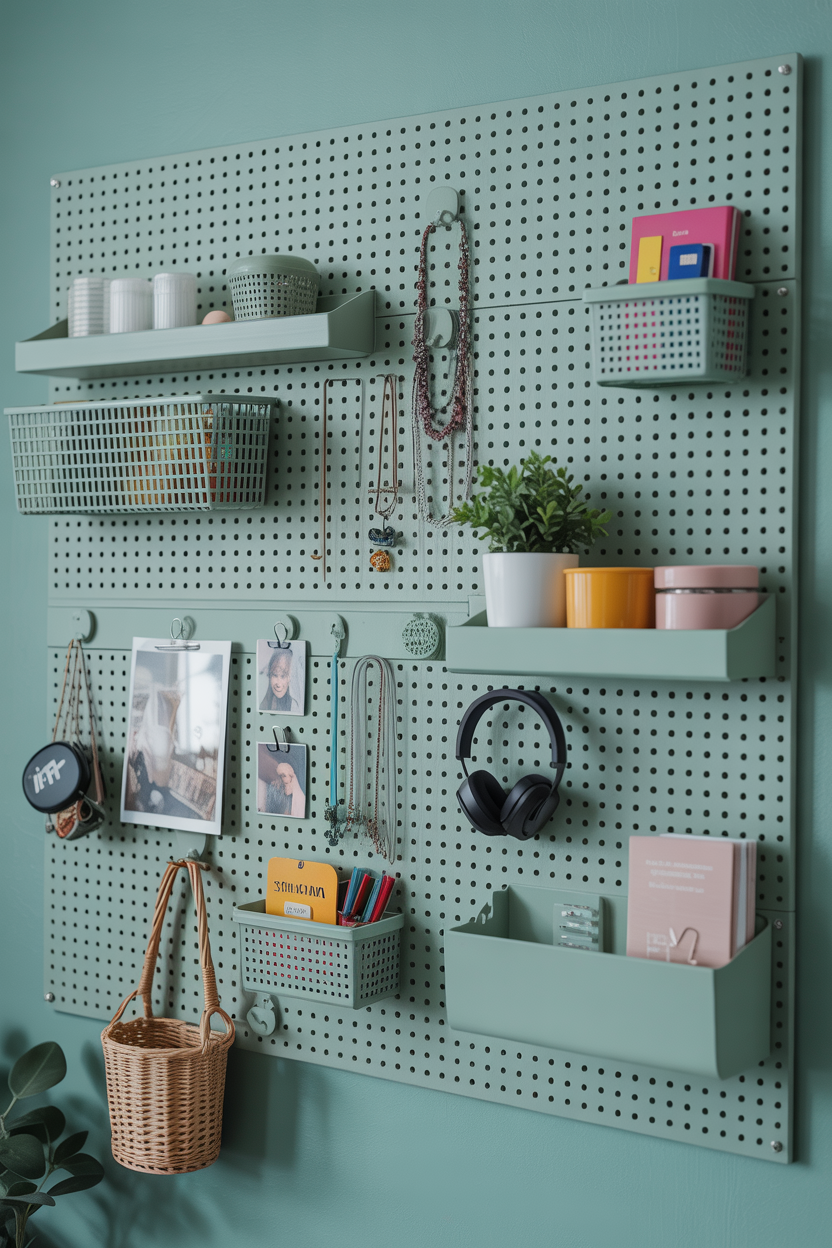
Pegboard walls transform vertical surfaces into ultra-flexible storage systems where every item has a designated, easily accessible spot. Unlike fixed shelving, pegboard configurations adapt constantly—hooks, baskets, and shelves move freely as needs change. This adaptability suits teens perfectly, accommodating evolving interests, school supplies, hobby materials, and daily essentials. Painting pegboard in on-trend colors elevates it from garage storage to bedroom design feature, while the organized display prevents small rooms from accumulating surface clutter.
Install pegboard using furring strips behind the board creating necessary space for peg insertion, securing firmly to wall studs for weight support. Paint before installation using colors that complement the room—white for minimalist aesthetics, pastels for soft vibes, bold colors for statement walls, or leave natural for industrial looks. Purchase varied pegboard accessories: hooks for bags and jewelry, small shelves for perfume or plants, baskets for supplies, clips for photos and notes, and specialized holders for specific items. Arrange accessories intentionally, balancing functional groupings (school supplies together, jewelry in one area) with visual composition. The beauty of pegboard is constant reorganization—what works this month can completely change next month without tools or new purchases. This flexibility makes pegboard ideal for teen spaces where interests and needs shift rapidly.
4. Make a Fabric Headboard With Foam and Textile
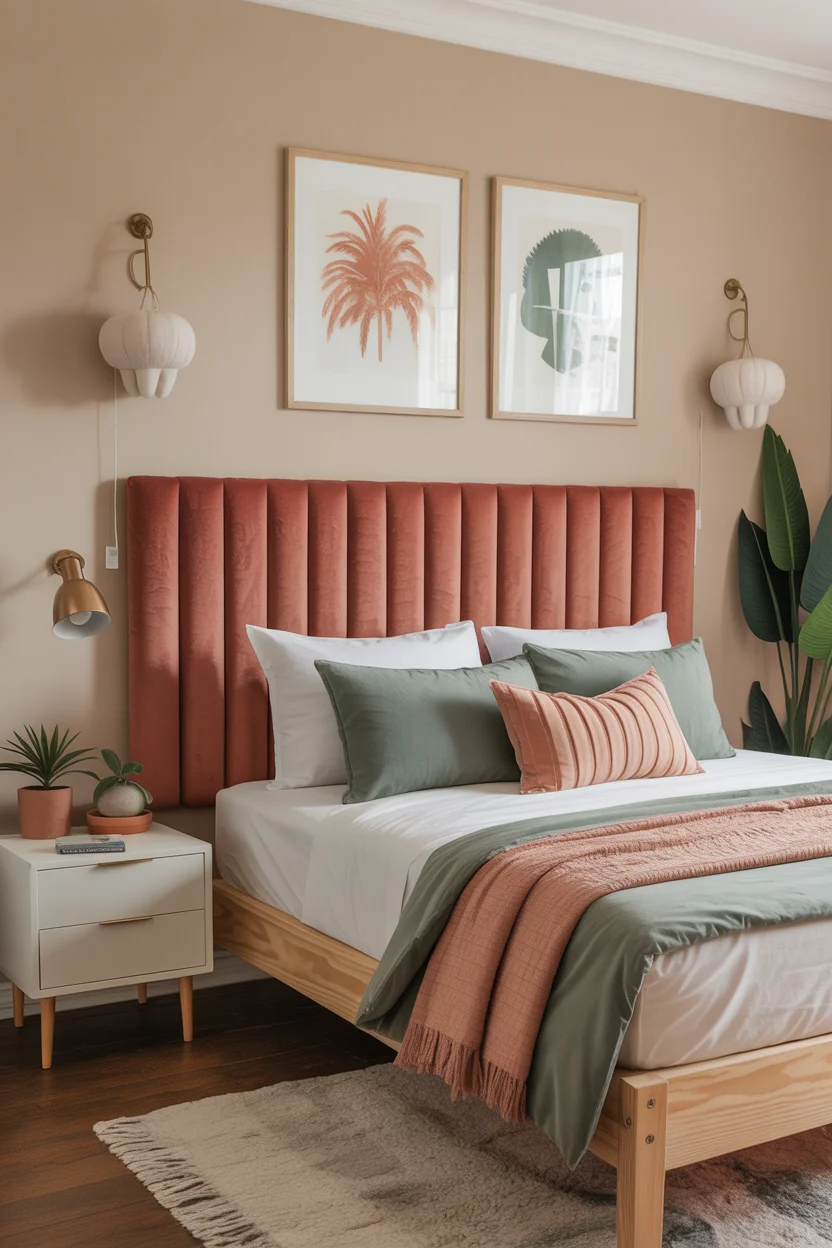
Fabric headboards add hotel-like luxury and significant visual impact for minimal investment, creating custom focal points that anchor small bedrooms. The DIY approach allows perfect size customization and fabric selection matching exact color schemes and style preferences—velvet for glamour, linen for casual elegance, fun prints for personality, or budget-friendly canvas. The padded surface provides comfortable support for sitting up reading or on devices, while the visual weight makes beds appear more substantial and intentional even in compact spaces.
Create fabric headboards by cutting plywood to desired dimensions—typically matching mattress width and 24-36 inches tall. Layer 1-2 inches of foam padding over the board, then wrap tightly with batting for smooth surface. Pull chosen fabric taut over the padded board, stapling securely on the back side, tucking corners neatly. Attach to walls using D-rings and anchors, or mount directly to bed frames. Consider simple rectangular shapes or add visual interest with curved tops, geometric angles, or channeled tufting using buttons. Total cost runs $30-60 depending on fabric choice and size, yet the impact rivals pieces costing hundreds. For renters or commitment-phobes, headboards can change seasonally by simply re-covering with new fabric, allowing room refreshes without major expense or permanent alteration.
5. Transform a Ladder Into a Blanket and Accessory Display
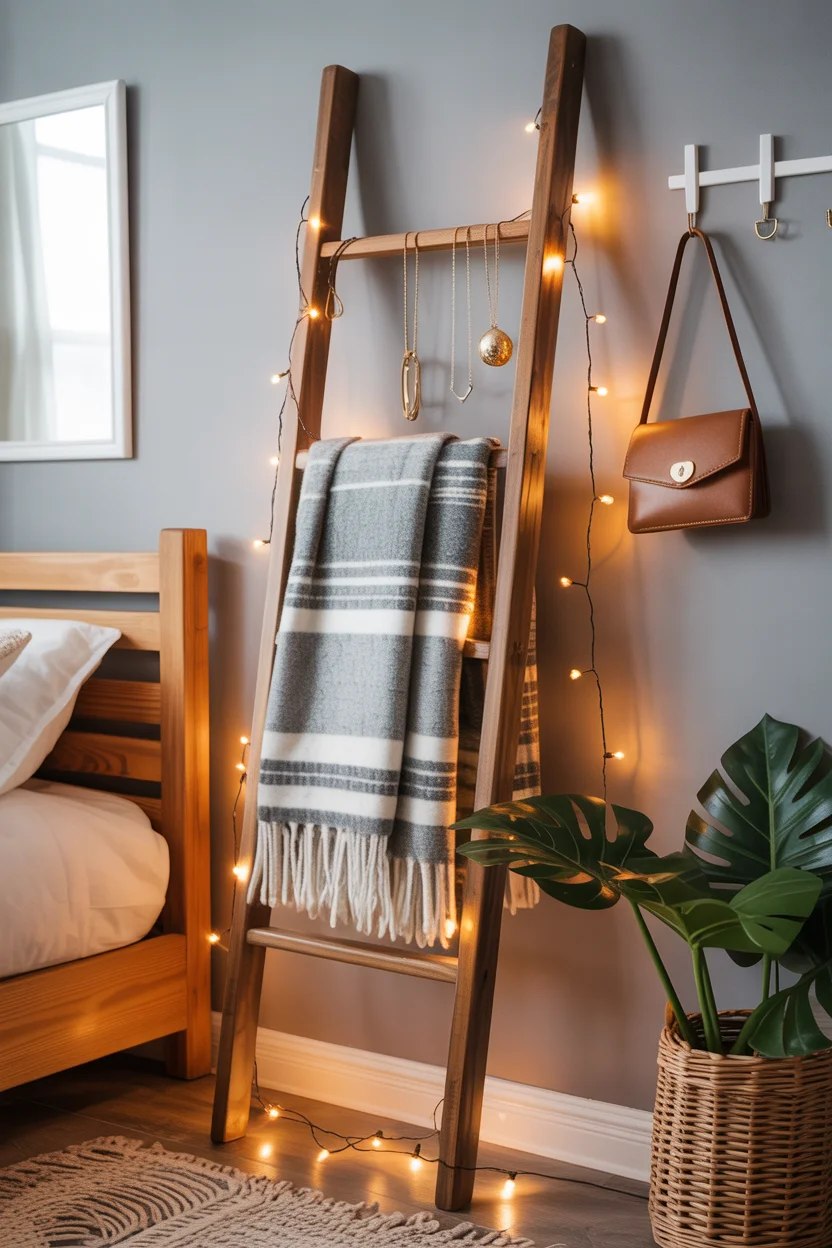
Decorative ladders bring vertical storage to small bedrooms without the permanence of wall-mounted systems, creating flexible organization that looks intentionally styled rather than purely functional. The angled lean takes minimal floor footprint while offering multiple rungs for display and storage. Ladders work particularly well for items used daily—throw blankets, bags, tomorrow’s outfit, scarves, or jewelry—keeping them accessible without consuming drawer or closet space. The rustic object itself adds textural interest and visual height that makes small rooms feel more spacious.
Source ladders from thrift stores, salvage yards, or build simple versions from 2×2 lumber and dowels. Sand rough edges and finish with stain for rustic appeal, paint for colorful statement, or leave raw for industrial vibes. Lean the ladder at a safe angle (approximately 15-20 degrees from vertical) against a sturdy wall, securing the top with small L-brackets if stability concerns exist. Drape blankets and throws over rungs, add S-hooks for hanging bags and accessories, weave string lights through rungs for ambiance, or use clip hangers for planning outfits. The beauty lies in flexibility—rearrange displays constantly without tools or commitment. For under $20 (often free with reclaimed ladders), this project adds major style while solving real storage challenges in space-limited teen bedrooms.
Explore morehttp://pinterest.com/Dreamgardenshome/
6. Create Washi Tape Wall Art Designs
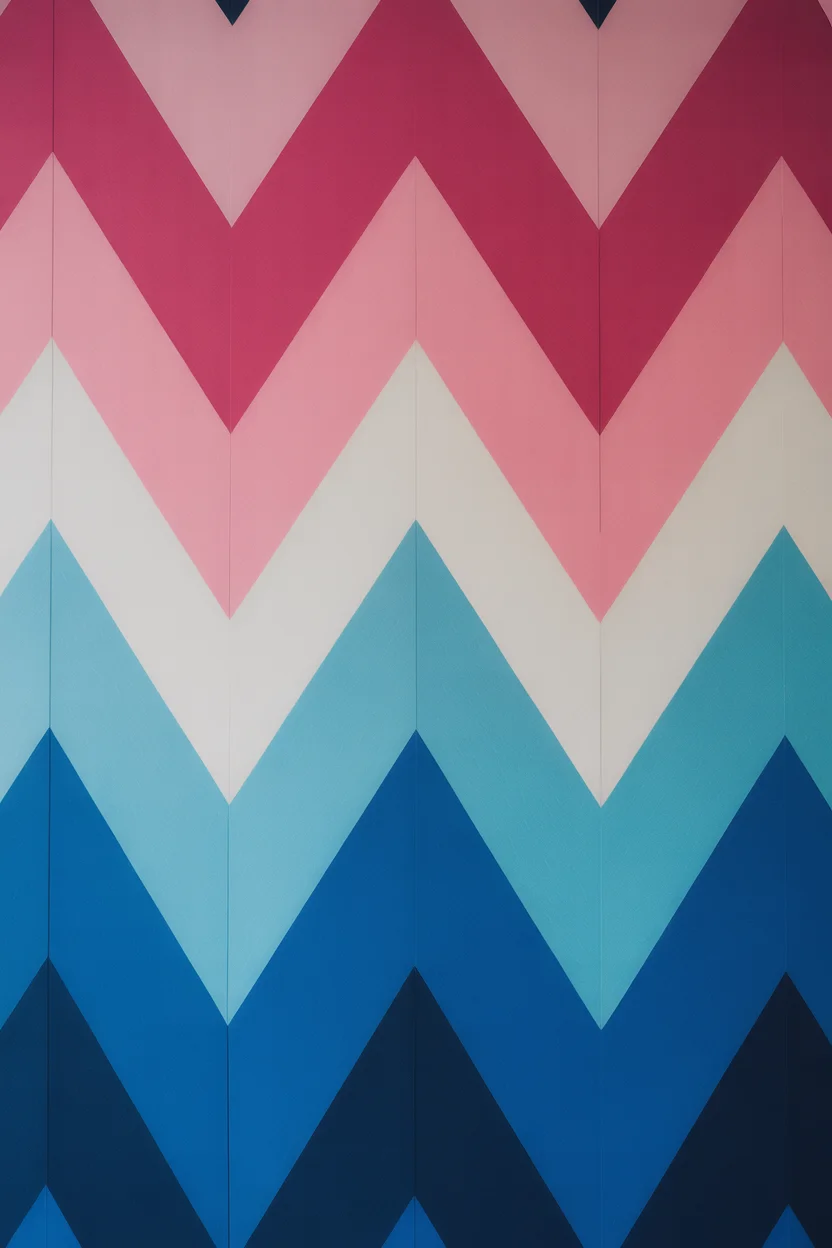
Washi tape wall art empowers teens to create bold, custom wall treatments without parental permission, painting skills, or permanent commitment—perfect for renters or changing tastes. The Japanese decorative tape comes in endless colors, patterns, and widths, allowing everything from geometric designs to inspirational quotes to abstract compositions. Unlike paint or wallpaper, mistakes peel off cleanly and redesigns happen on a whim. The low-stakes, high-impact nature makes this ideal for teens experimenting with design while creating Instagram-worthy backdrops for photos.
Plan designs beforehand by sketching on paper or using painter’s tape to preview layouts. Popular options include geometric mountains, sunbursts, abstract color blocks, oversized words or phrases, arrow patterns, or frames around existing artwork. Use quality washi tape that adheres well but removes cleanly—test on a small area first. Apply tape smoothly, pressing firmly, creating crisp lines and intersections. Combine multiple colors and widths for dimensional interest. The entire project costs $15-30 depending on design complexity and tape quantity, yet delivers impact rivaling expensive wall decals. When interests change or a new color scheme beckons, simply peel off and start fresh. This flexibility and affordability make washi tape perfect for teen spaces where change is the only constant.
7. Build a Custom Desk From Sawhorses and Wood Slab
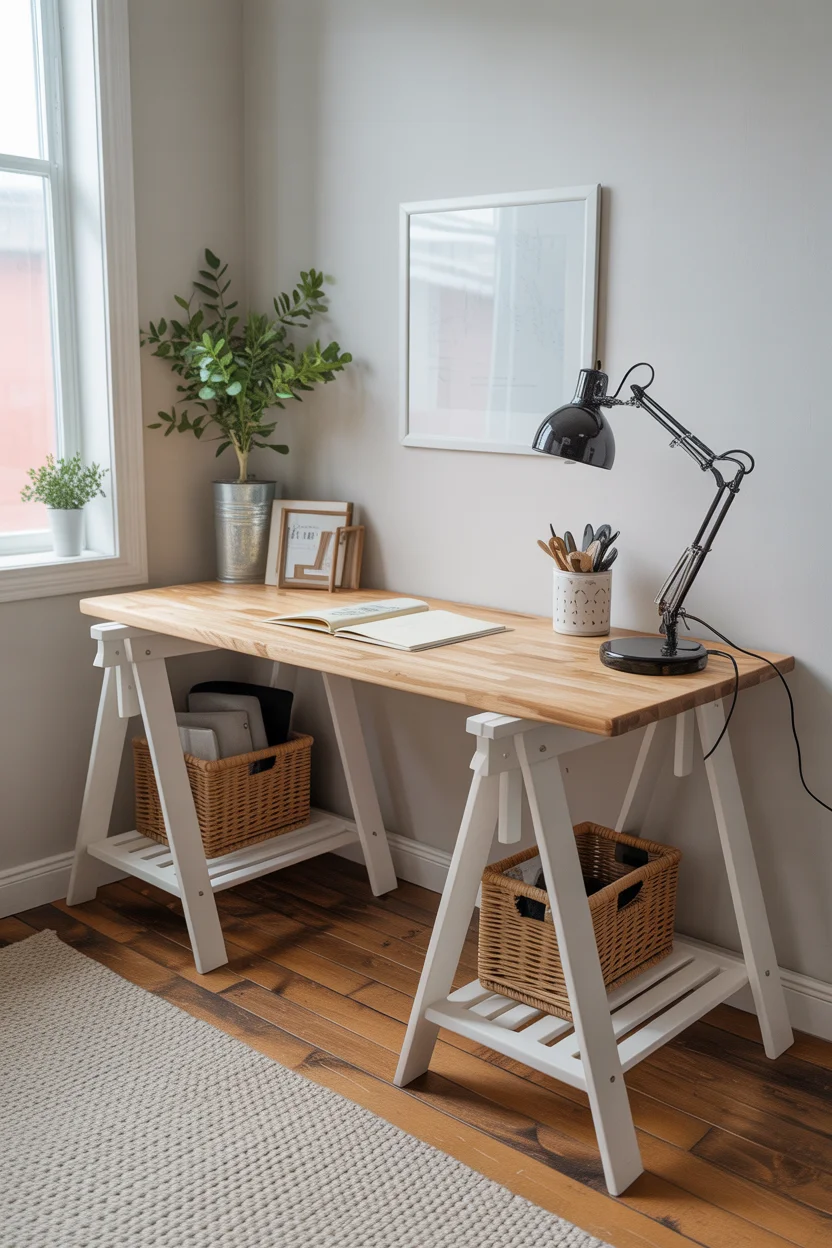
Sawhorse desks offer the perfect combination of affordability, simplicity, and customization for teen bedrooms where standard furniture rarely fits properly or matches style preferences. The two-piece construction—separate legs and top—allows precise sizing for awkward spaces, easy moving, and future reconfiguration. Open bases provide valuable under-desk storage for bins, a mini fridge, or a small bookshelf, maximizing every inch in compact rooms. The clean, modern aesthetic suits current design trends while the budget-friendly build (typically $60-120) leaves money for other room improvements.
Purchase sawhorse legs (pre-made metal, wood, or adjustable versions) and separately source a desktop—butcher block countertop, solid wood slab, or even a hollow-core door. Countertop remnants from home improvement stores often cost $30-50 and provide quality surfaces. Sand the desktop if necessary and finish with stain, paint, or clear sealer. Simply place the top across the sawhorses—the weight keeps it stable though you can add brackets or velcro for security. Standard desk height runs 28-30 inches; ensure sawhorses accommodate this or buy adjustable versions. Customize with paint (gold sawhorses look particularly chic), add keyboard trays, install a monitor shelf using wood and brackets, or attach organizers to the underside. The resulting desk fits exactly where you need it while providing generous workspace essential for homework, creative projects, and digital activities.
8. Design a Gallery Wall With Thrifted Frames
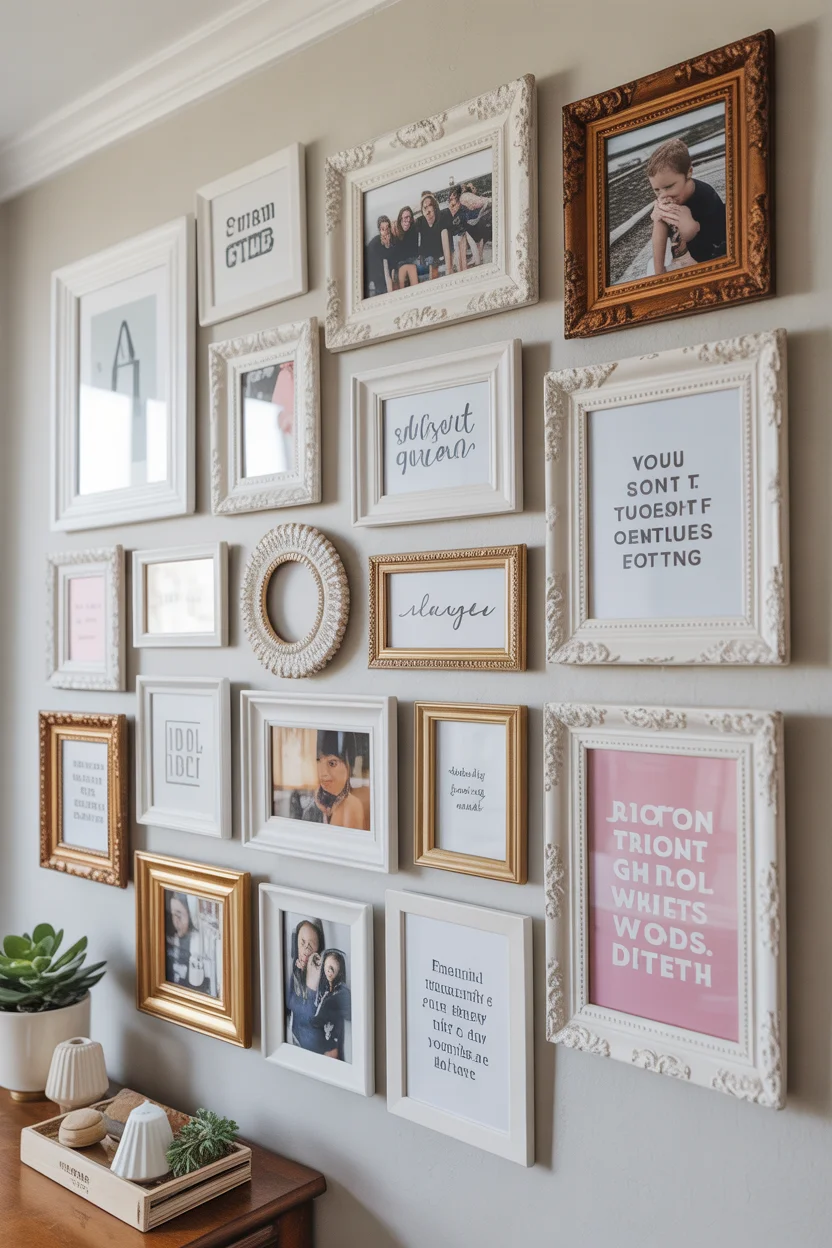
Gallery walls transform blank expanses into personal storytelling spaces without expensive art or designer frames. Thrifted frames—usually $1-3 each—provide the foundation for collections that feel curated and expensive when unified through paint color and thoughtful arrangement. This approach celebrates individuality while creating polished, cohesive displays. Small bedrooms benefit particularly from gallery walls that add personality without consuming floor space, drawing eyes upward and making rooms feel larger. The changeable nature suits teens perfectly—swap photos and prints as interests evolve without replacing the entire frame collection.
Collect 7-15 frames in varied sizes and styles from thrift stores, garage sales, or discount stores. Remove glass, backing, and hardware, then paint all frames the same color—white for classic, black for modern, gold for glam, or bold colors for personality. While frames dry, select gallery contents: printed photos, art downloads, inspirational quotes designed in Canva, magazine pages, fabric swatches, or mixed media. Arrange frames on the floor first, playing with composition until balanced—typically centering one larger piece with smaller frames clustered around. Maintain consistent spacing (2-3 inches) between frames. Mark wall positions and hang using appropriate hardware. The result looks professionally designed yet costs under $40 and tells uniquely personal stories. Update individual frames seasonally while maintaining the overall structure.
9. Install Floating Shelves Above the Bed
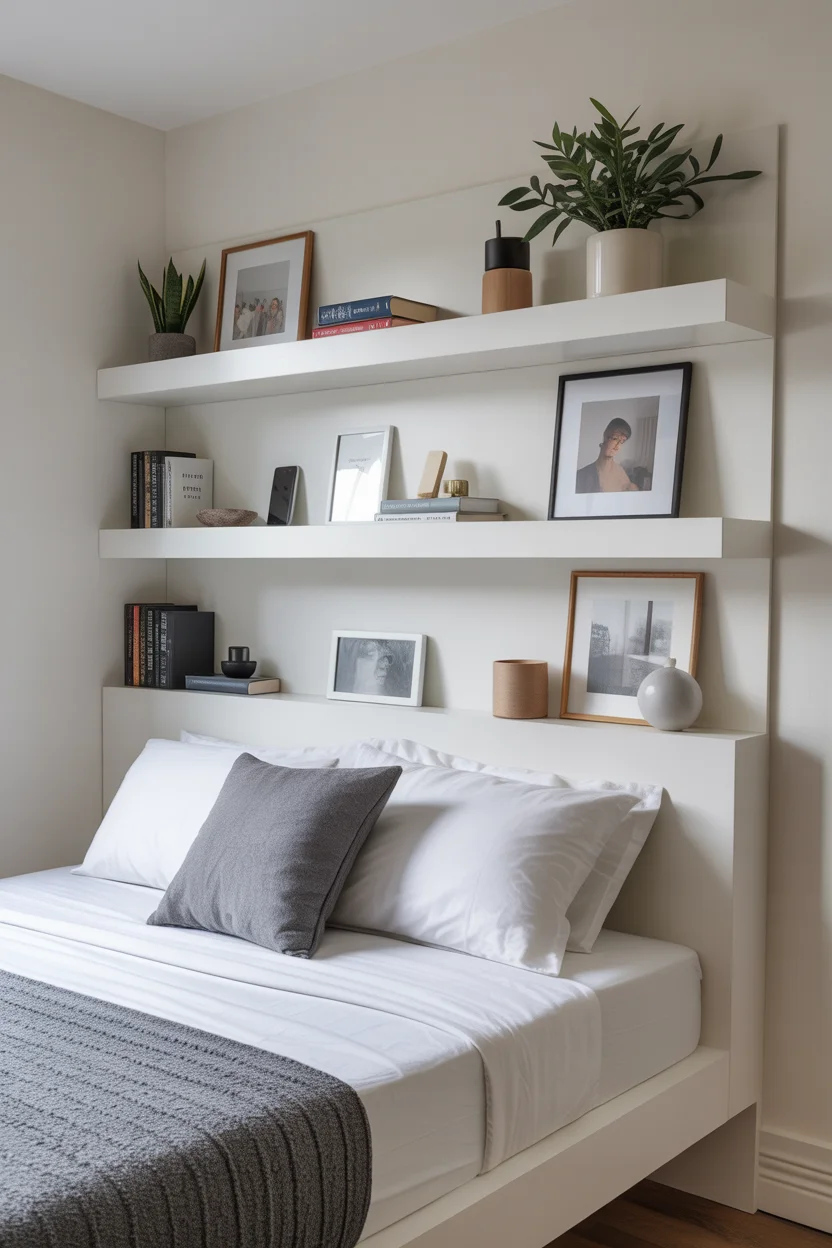
Floating shelves above beds serve triple duty—headboard visual weight, nightstand storage, and decorative display—while consuming zero floor space, crucial in small teen bedrooms where every square foot counts. The sleek, minimalist aesthetic suits contemporary tastes while the practical storage keeps phones, glasses, books, and essentials within arm’s reach. Unlike traditional nightstands that crowd small rooms, overhead shelving maintains open floor area while providing equal or better functionality. The modern approach feels young and current, rejecting traditional bedroom furniture arrangements.
Install floating shelves using quality hardware rated for weight, securing to wall studs for safety—shelves above beds must be firmly attached. Position the lowest shelf 8-12 inches above mattress level for easy reach while preventing head bumps. Install 2-3 shelves spaced 10-14 inches apart, staggered or aligned based on preference. Shelf depth of 6-8 inches provides adequate space without items falling on sleepers. Keep displays intentional and secured—use museum putty for items that might fall during restless sleep. Perfect items include small plants, books, phone charging stations, alarm clocks, small framed photos, and lightweight decorative objects. Avoid heavy items directly over the pillow area. Paint shelves to match walls for seamless integration or choose contrasting colors for statement appeal. This modern storage solution costs $30-60 while solving multiple small-room challenges simultaneously.
10. Make String Art in Custom Designs
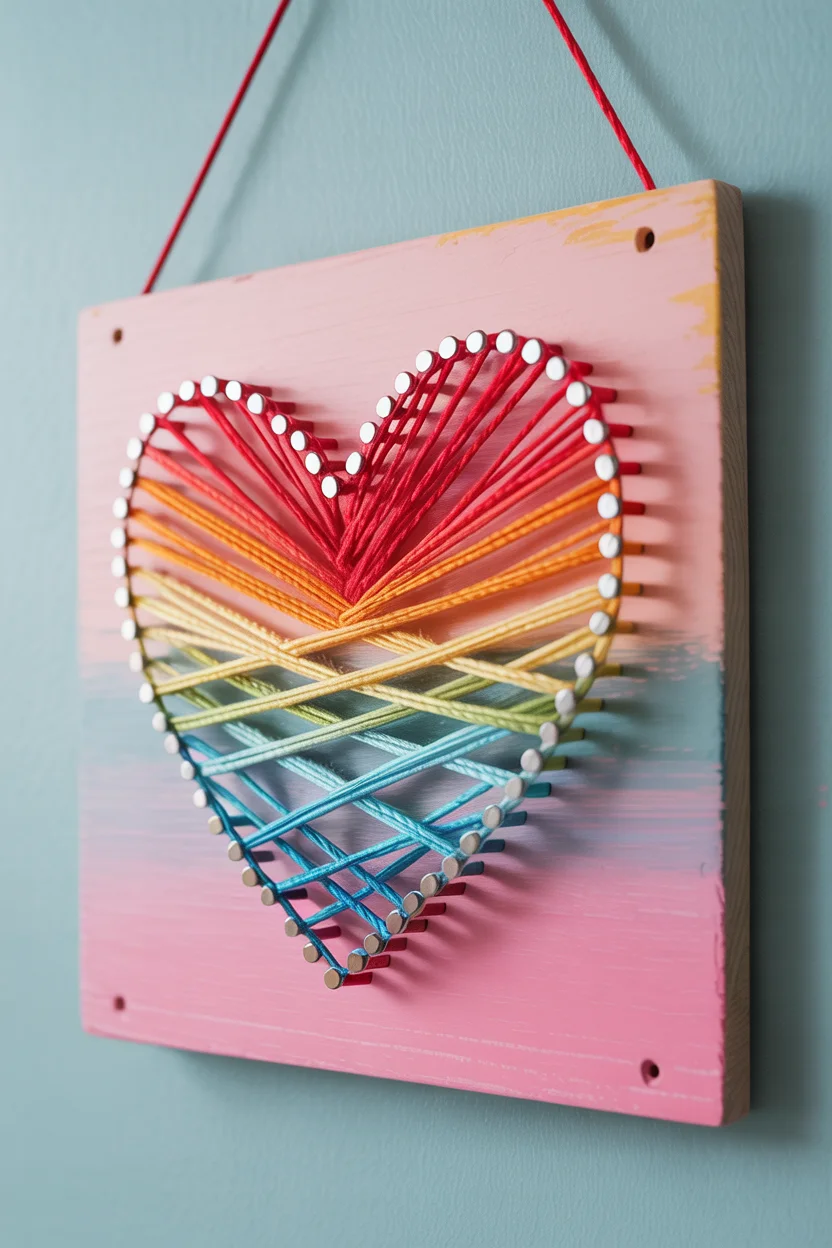
String art combines crafting satisfaction with custom wall art, creating textured, dimensional pieces impossible to purchase in stores. The hands-on process appeals to creative teens while producing genuinely impressive results worthy of prominent display. Designs range from simple geometric shapes to complex portraits, inspirational words, or favorite symbols—completely customizable to individual interests and room color schemes. The finished pieces add handmade character that feels authentic and personal, perfect for teen spaces emphasizing individuality over generic décor.
Create string art using a wooden board or plywood cut to desired size, spray paint or stain as background color, then transfer your chosen design onto the surface. Hammer small nails (typically 1-inch wire nails) around the design outline spaced every 1/4 to 1/2 inch. Tie embroidery thread or thin yarn to a starting nail, then wrap around perimeter nails and across interior nails creating your desired pattern—solid fill, gradient, geometric pattern, or outline only. Popular beginner designs include hearts, initials, simple geometric shapes, or state outlines. Advanced projects tackle portraits, complex quotes, or detailed imagery. Materials cost $10-20, while the time investment runs 2-4 hours depending on complexity. The meditative wrapping process provides screen-free crafting time, and the finished piece becomes a conversation starter and point of pride showcasing patient craftsmanship and personal creativity.
11. Repurpose Shoe Organizers for Accessory Storage
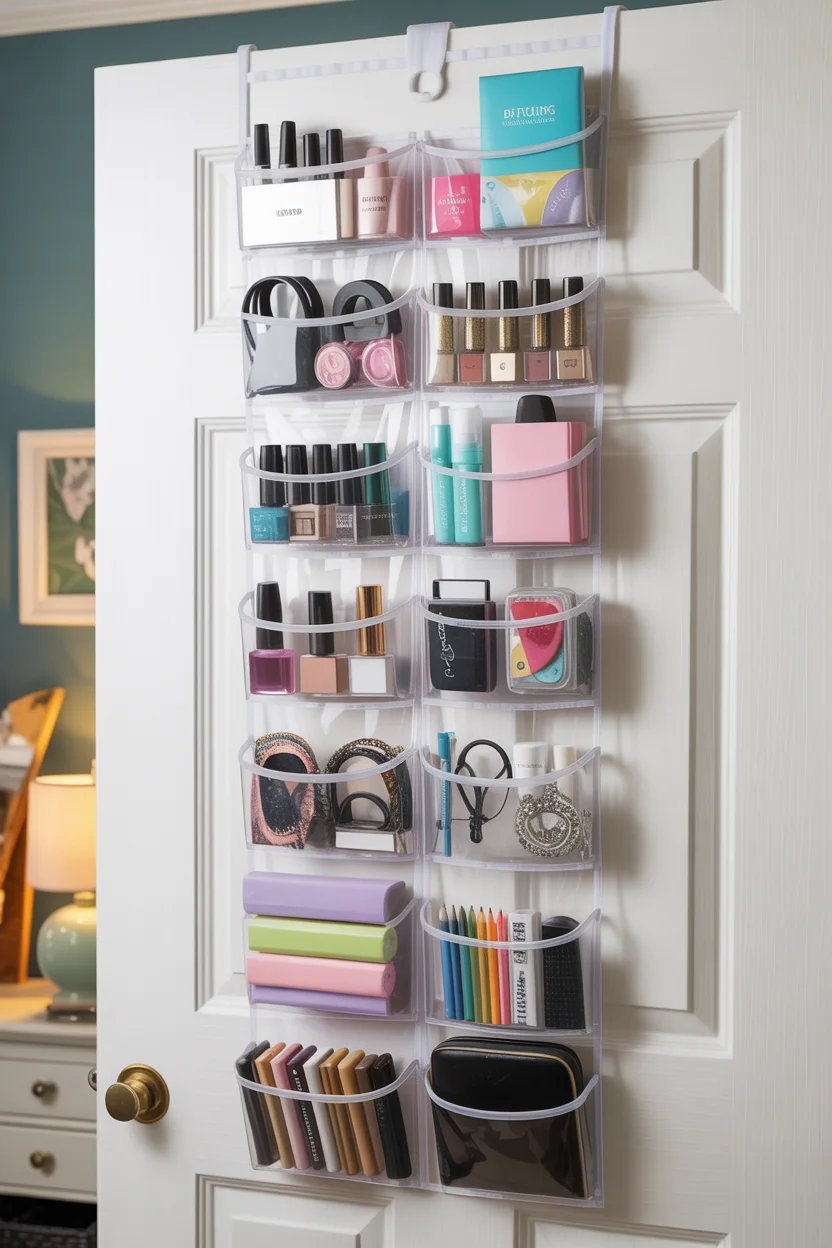
Over-door organizers maximize vertical space on typically unused door backs, creating substantial storage without consuming precious floor area or wall space. The clear pocket design keeps contents visible, eliminating the “out of sight, out of mind” problem plaguing drawer storage. This visibility helps teens actually maintain organization since everything has an obvious designated spot. The versatile pockets accommodate vastly different items—beauty products, accessories, school supplies, tech cables, small books, or hobby materials—making these organizers adaptable as interests and needs evolve.
Purchase over-door shoe organizers specifically designed for bedroom doors (slimmer profiles than closet door versions). Hang following package directions, ensuring the door closes fully. Organize contents strategically: beauty products and daily accessories at eye level, less-used items higher or lower, grouped by category or color for visual appeal. Use small bins or zippered bags within pockets for tiny items like earrings or hair ties. The transparent design naturally encourages maintaining organization since mess is immediately visible. Beyond standard pocket organizers, consider hanging organizers with varied pocket sizes, shelf combinations, or specialized designs. This simple $15-25 investment creates storage for 50+ items while keeping them accessible and visible. The door-mounted solution works perfectly in small bedrooms where closet space is limited and surface area practically nonexistent.
12. Create a Macramé Wall Hanging for Boho Texture
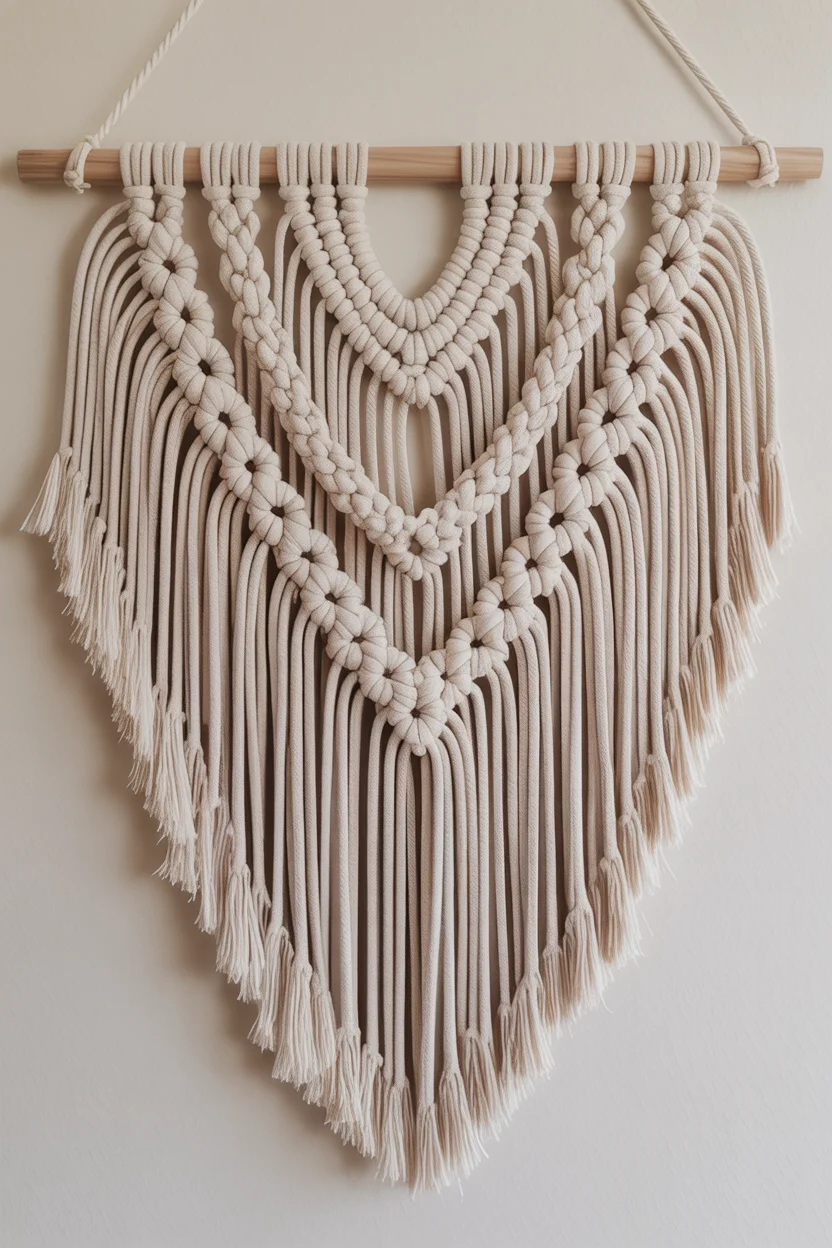
Macramé wall hangings add textural warmth and bohemian charm while teaching valuable knotting skills through an accessible craft. The repetitive knotting provides meditative, screen-free activity that produces genuinely impressive results even for beginners. Modern macramé suits current design trends favoring natural materials and handmade elements, while the neutral tones complement virtually any color scheme. Large-scale pieces make major visual impact in small bedrooms, adding softness that balances harder furniture and surfaces while not overwhelming limited floor space.
Learn basic macramé knots—square knot, half hitch, spiral knot—through free YouTube tutorials, then design original wall hangings or follow patterns. Purchase macramé cord (3-5mm diameter works well) in cotton or jute from craft stores. You’ll need a dowel or driftwood rod for hanging, plus a metal ring or hook for wall mounting. Cut cords to appropriate lengths (patterns specify, but generally 4-8 times finished length to account for knotting). Secure cords to dowel using lark’s head knots, then work your design downward, incorporating learned knotting techniques. Total material cost runs $15-30 depending on size. Working time varies from 3-6 hours for beginners. The finished piece adds substantial wall presence while showcasing handcraft skills. Display prominently above beds, desks, or dressers where the textured art creates focal points without requiring floor space.
13. Build a Rolling Storage Cart for Multi-Functional Use
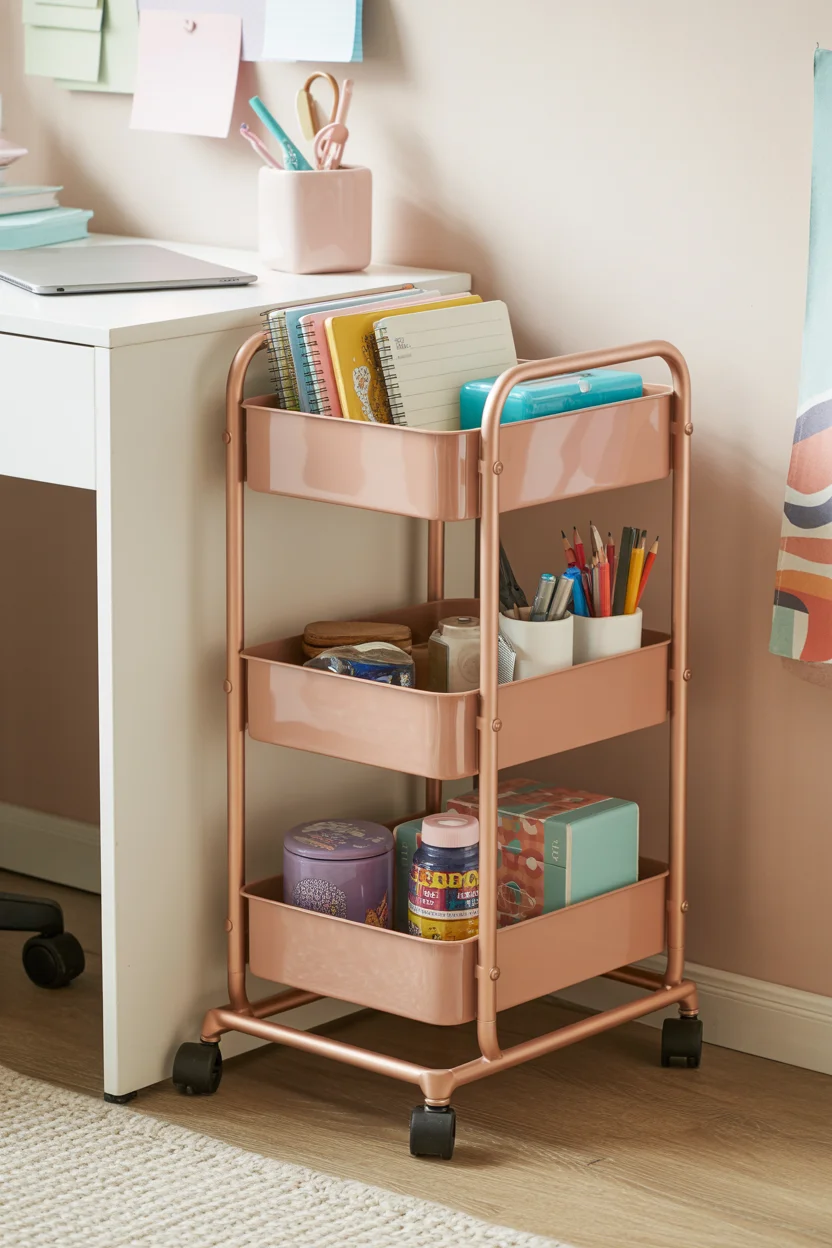
Rolling storage carts provide flexible, mobile organization that adapts to changing activities—homework station by the desk, beauty products near the mirror, art supplies by the window, or snacks bedside for movie nights. The wheeled mobility allows reconfiguration based on current needs without permanent placement decisions. Multi-tier designs maximize vertical storage while maintaining small footprints crucial in compact bedrooms. The open basket or shelf design keeps contents visible and accessible, encouraging organization while serving as decorative display for color-coordinated supplies or aesthetically pleasing items.
Purchase basic rolling carts from discount stores ($20-40) or build custom versions from wood and caster wheels. Popular configurations include three-tier basket styles, shelf versions with rails, or drawer combinations. Customize inexpensive carts with spray paint in trendy colors—blush pink, sage green, matte black, or metallics. Organize cart contents by activity: tier one for current school supplies, tier two for creative materials, tier three for tech accessories and chargers. Alternatively, organize by frequency—daily essentials on top, occasional items middle, rarely-needed supplies bottom. Add small bins, mason jars, or cups within tiers for smaller items. Label using tags or chalkboard labels. The cart wheels wherever needed—bedside for morning routine, beside desk for homework, near door for backpack loading—then tucks away neatly. This flexibility maximizes utility while minimizing the permanent space commitment essential in small teen bedrooms.
14. Design a Bulletin Board With Cork Tiles
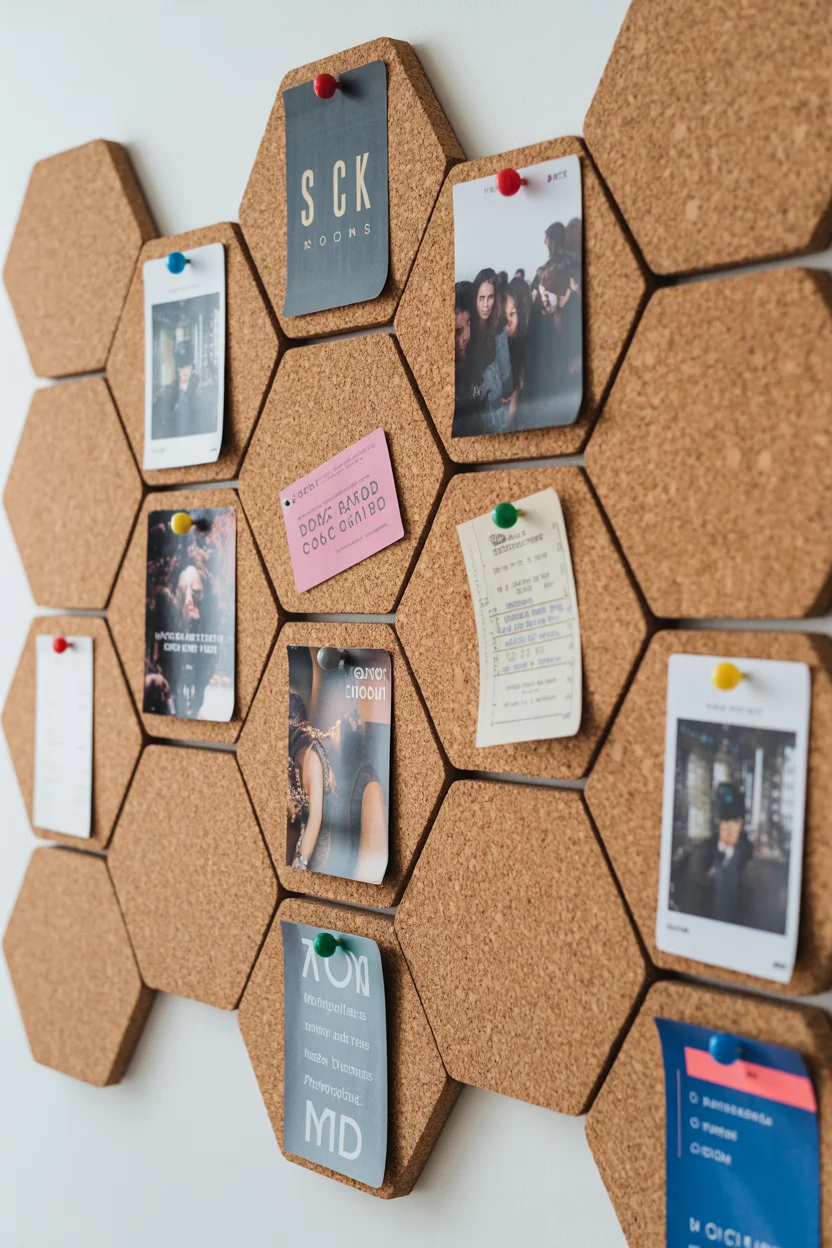
Bulletin boards provide constantly changing displays for photos, schedules, inspiration, and memories, but traditional rectangular cork boards read boring and office-like. Modern cork tile approaches—hexagons, squares, or organic shapes—transform functional pinning space into intentional design features. The modular nature allows starting small and expanding over time, creating perfect solutions for renters who can’t paint or for commitment-resistant teens who change preferences frequently. The three-dimensional tiles add textural interest while maintaining full cork functionality for pinning evolving displays.
Purchase cork tiles in various shapes—hexagons create trendy honeycomb patterns, squares form grid compositions, or mix shapes for eclectic designs. Install using adhesive backing (included on many tiles) or command strips for damage-free mounting. Plan your composition beforehand by arranging tiles on the floor—symmetrical grids, scattered organic clusters, or planned patterns all work beautifully. Leave small gaps between tiles for visual interest and design definition. Popular arrangements include honeycomb clusters above desks, scattered tiles framing beds, or full accent walls in cork. Pin photos using colorful push pins, washi tape, or mini clothespins. Update displays constantly—monthly photo rotations, seasonal color schemes, or evolving inspirational quotes. Materials cost $30-60 for substantial coverage. The modern, modular approach creates functional display space while contributing genuine design value rather than looking like afterthought organization.
15. Make Cloud or Moon Shelves for Whimsical Storage
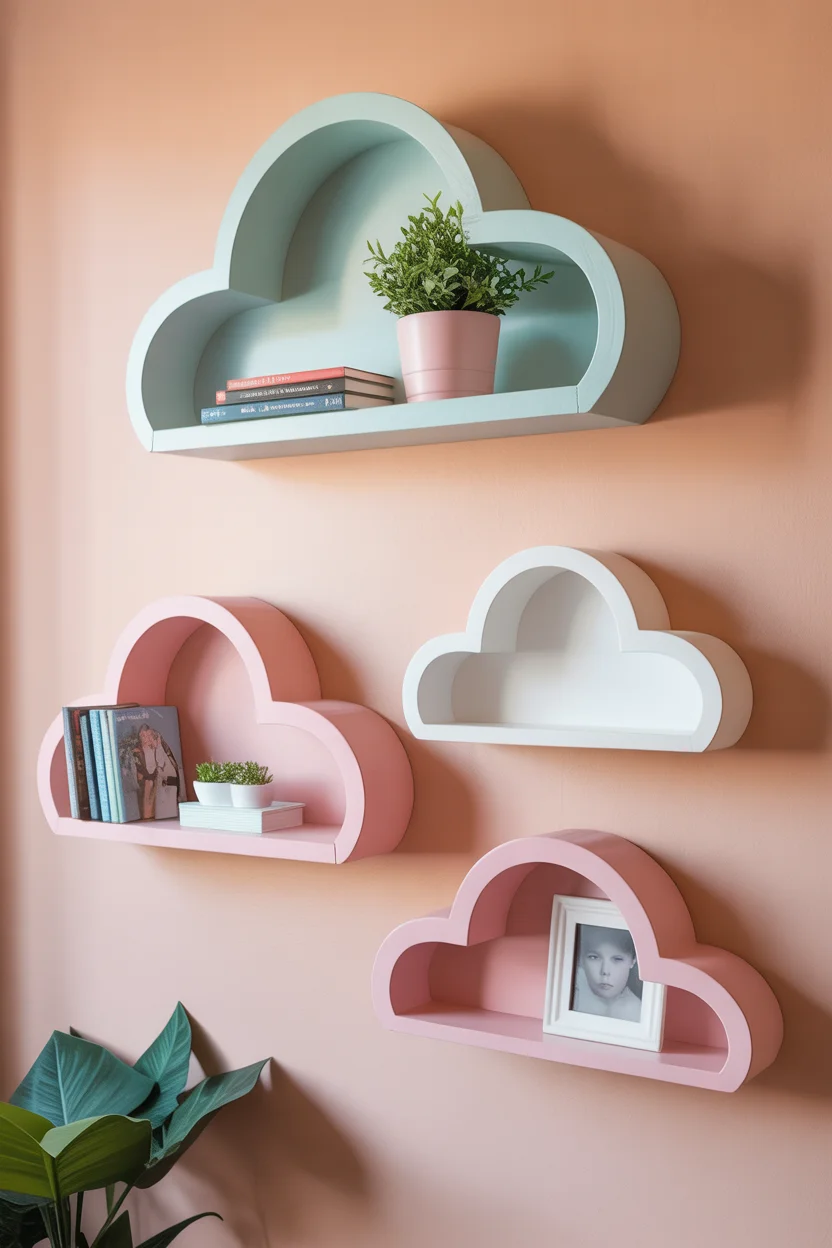
Shaped shelves—clouds, moons, mountains, or other organic forms—add playful personality while maintaining full functionality, proving storage doesn’t require boring rectangles. These custom pieces express individual style and interests through shape selection while serving genuine organizational needs. Cloud shelves particularly suit dreamy, creative aesthetics; moon shapes fit celestial or boho themes; mountain profiles complement adventure-lovers. The hand-crafted nature ensures unique pieces unavailable in stores, while the relatively simple construction suits beginners. Small bedrooms benefit from the vertical storage without the visual heaviness of standard shelving units.
Create shaped shelves by drawing designs on 3/4-inch plywood or solid pine boards—clouds, crescents, hexagons, or custom shapes reflecting personal interests. Cut carefully using jigsaws (adult supervision required for power tools) or request cuts at home improvement stores. Sand all edges smooth, especially visible fronts and tops. Paint in colors complementing room schemes—white or pastels for soft looks, bold colors for statements, or stain for natural wood beauty. Install using L-brackets or floating shelf hardware hidden on back sides. Mount at varied heights in clustered groupings or scattered compositions. Keep clouds or shapes proportional—4-8 inch heights and 10-18 inch widths work well for functional storage without overwhelming walls. Style shelves with lightweight items: small plants, photos in acrylic frames, collected objects, or grouped candles. Total cost runs $15-25 per shelf, creating custom storage that expresses personality while maintaining practicality.
16. Transform Mason Jars Into Desk Organizers
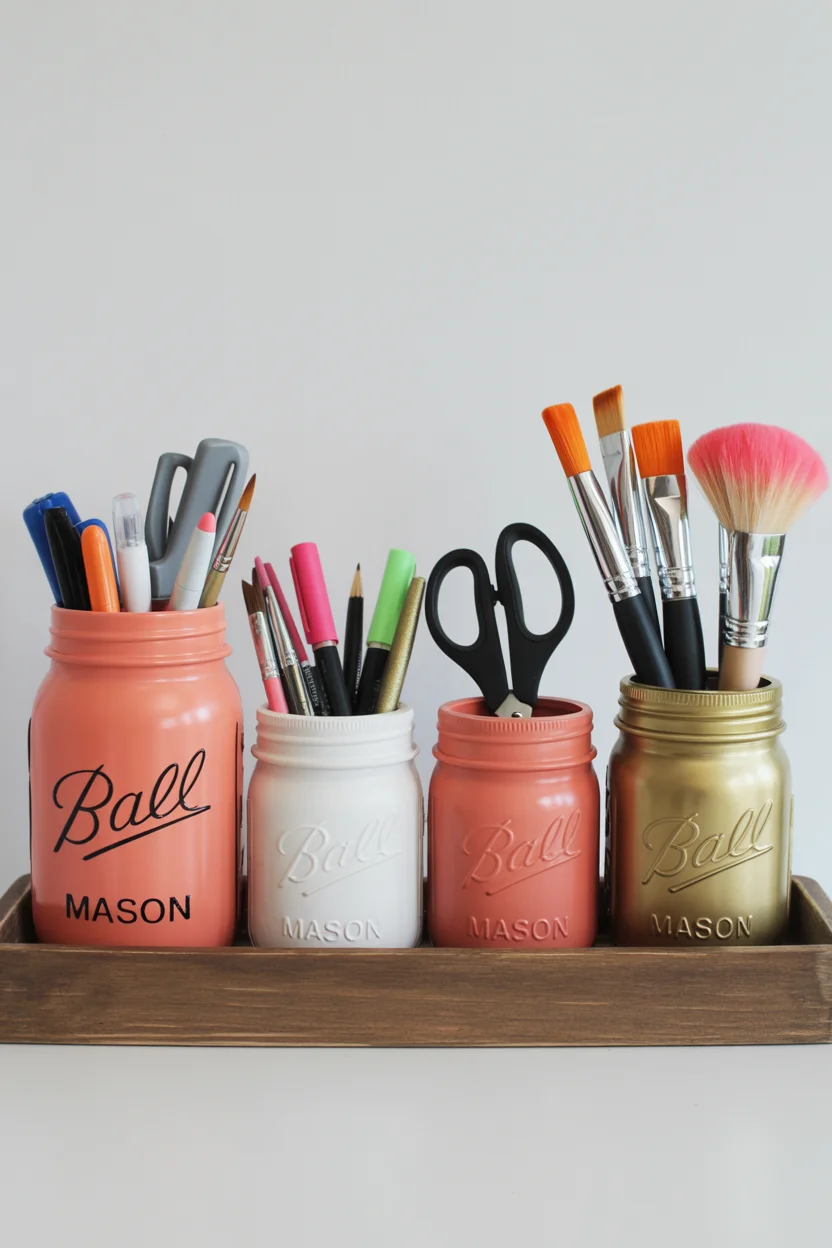
Mason jar organizers transform free or cheap glass containers into customized storage matching exact color schemes and style preferences. The transparent or painted jars keep supplies visible and accessible while looking intentionally designed rather than randomly collected. Grouping multiple jars creates organized systems for different supply categories—writing implements, art supplies, beauty tools, craft materials—preventing the drawer chaos typical in teen rooms. The jar solution works equally well on desks, dressers, or vanities, providing flexible storage wherever needed in compact bedrooms.
Collect mason jars in various sizes—pint, quart, and half-pint sizes create nice variation. Clean thoroughly and remove labels completely. Paint exteriors using acrylic craft paint or spray paint, applying multiple thin coats for even coverage. Choose cohesive color palettes: pastels for soft looks, metallics for glamour, bright colors for energy, or ombré gradients for sophistication. Leave some jars clear for contrast. Let dry completely. Arrange on trays, lazy susans, or directly on surfaces, grouping by size or alternating heights. Assign jar purposes: pencils and pens, highlighters and markers, scissors and tools, makeup brushes, paint brushes, or craft supplies. Labels add organization while contributing design elements—use chalkboard paint sections with chalk labels, adhesive vinyl lettering, or printed label wraps. The total cost typically runs under $10 (paint and jars), yet the organized, coordinated result looks intentional and polished while keeping essential supplies accessible and visible.
17. Create an Under-Bed Storage System With Bins
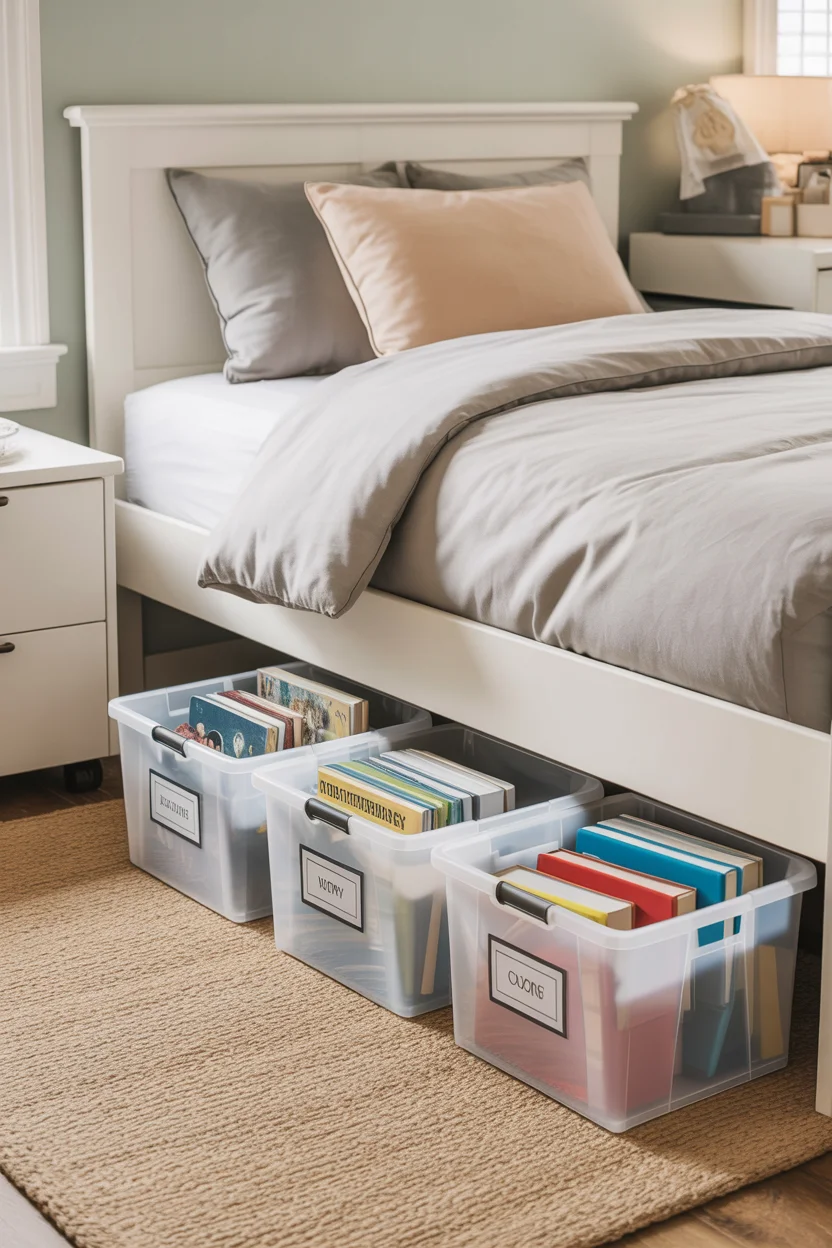
Under-bed space represents the largest underutilized storage area in most bedrooms, especially crucial in small teen rooms where closet space is limited and visible clutter creates stress. Converting this hidden area into organized storage through bins, boxes, or drawer systems instantly increases usable storage capacity by 15-20 cubic feet. Rolling containers provide easy access to items stored toward the back, eliminating the frustrating excavation required with static boxes. This hidden storage suits items needed occasionally rather than daily—seasonal clothing, memory boxes, extra bedding, or archived school projects.
Measure under-bed clearance carefully—standard beds offer 12-15 inches, though platform beds may provide less. Purchase or build rolling storage bins fitting these dimensions. Consider clear bins for visibility, canvas bins for softer aesthetics, or plastic bins for durability and moisture protection. Add wheels to boxes lacking them, or opt for pre-wheeled versions. Organize contents strategically: off-season clothes in vacuum bags maximizing space, memory items in labeled boxes, extra bedding in breathable containers, or categorized storage for hobby supplies. Label clearly—handwritten tags, printed labels, or chalkboard labels. Pull bins out monthly to prevent “out of sight, out of mind” accumulation. Consider bed risers (typically adding 3-6 inches) if current clearance is insufficient, expanding storage capacity significantly. This hidden storage approach keeps floors and surfaces clear while accommodating substantial belongings—essential in small teen bedrooms where visible organization maintains sanity.
18. Make a Jewelry Organizer From a Picture Frame
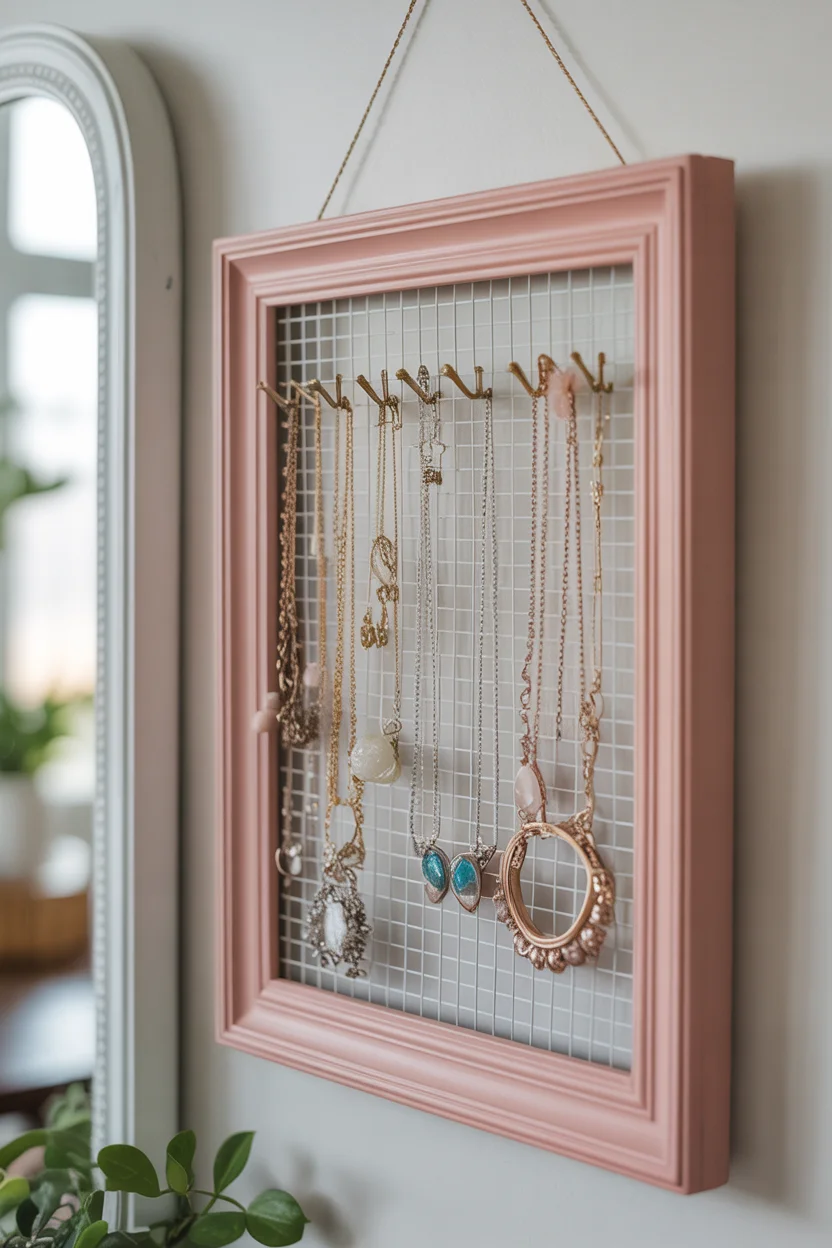
Picture frame jewelry organizers combine beautiful display with functional storage, transforming tangled drawer jewelry into organized, accessible collections. The wall-mounted design saves drawer and surface space while preventing the necklace tangles and lost earrings plaguing traditional jewelry boxes. Hanging jewelry where it’s visible encourages actually wearing pieces rather than forgetting them in boxes. The frame design allows creative expression through paint color, distressing, or embellishment, creating custom organizers matching room aesthetics. Small bedrooms benefit from the vertical storage that keeps jewelry organized without consuming precious surface area.
Source frames from thrift stores, discount stores, or repurpose existing ones—8×10 to 11×14 sizes work well for substantial jewelry collections. Remove glass and backing. Paint or refinish frames as desired. Replace glass with wire mesh, decorative metal screening, chicken wire, or even lace fabric stretched taut—materials that allow hook insertion. Secure screening/mesh to the frame back using staples or strong adhesive. Attach picture hanging hardware. Mount on walls near mirrors or dressing areas. Hang necklaces and bracelets on small cup hooks screwed into the frame edges, S-hooks on the mesh, or directly over mesh wires. Attach earrings through mesh holes or add small cork sections for posting. The organized, displayed jewelry becomes decorative wall art while remaining perfectly functional. Total cost runs $5-15 depending on materials, creating custom storage far superior to commercial jewelry boxes while adding genuine design value to bedroom walls.
19. Build Crate Shelving for Rustic Storage
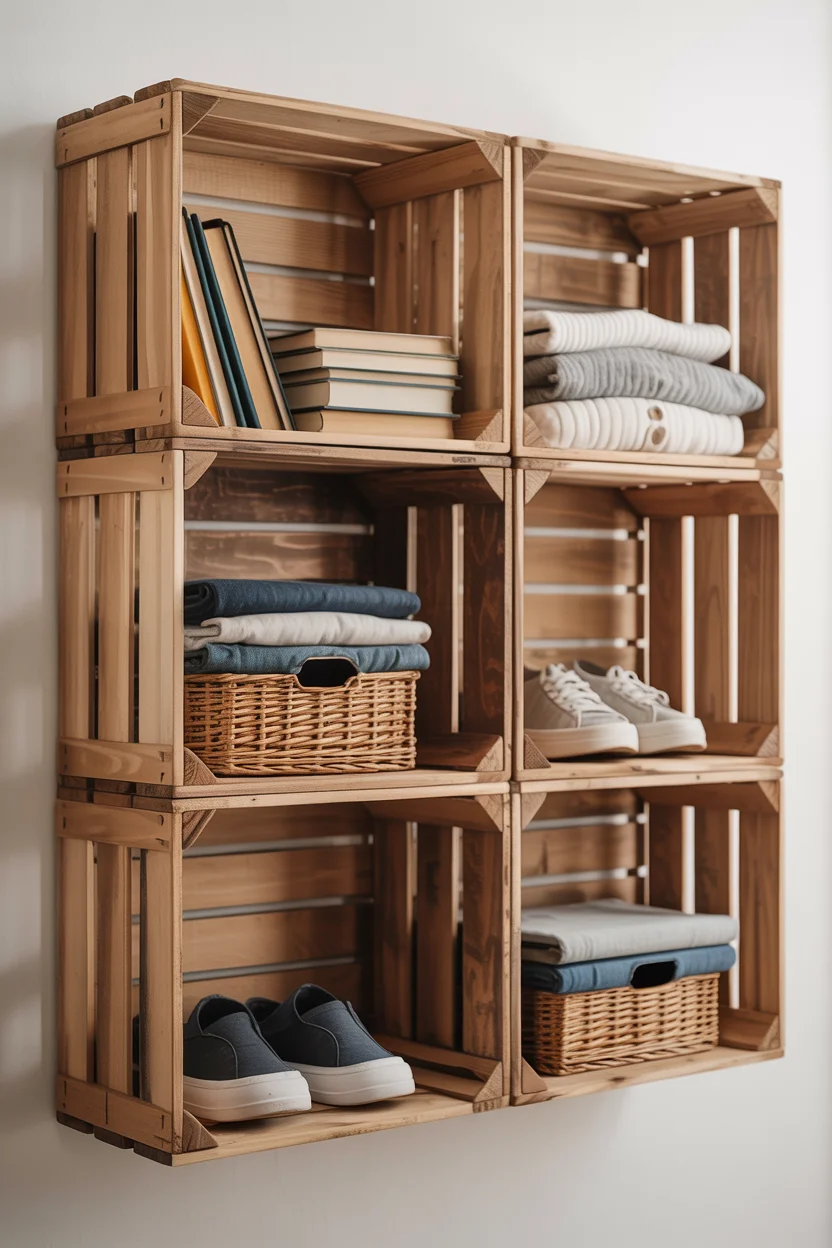
Wooden crate shelving offers rustic charm and surprising storage capacity while remaining completely reconfigurable—stack, mount, or rearrange as needs change. The open cubby design keeps contents visible and accessible, while the crate aesthetic adds natural wood texture and casual style. Thrift stores, craft stores, and online retailers offer crates in various sizes, or free salvaged versions from grocery stores work perfectly. The modular approach allows starting with a few crates and expanding over time, creating budget-friendly storage that grows with needs and finances.
Source wooden crates ensuring they’re structurally sound—check for splinters, loose boards, or damage. Clean and sand rough areas. Finish with stain, paint, or leave natural depending on desired aesthetic. Common configurations include stacked squares (four crates creating grid), horizontal rows, vertical towers, or mixed arrangements. Secure crates together using wood glue and screws through sides, then mount assemblies to walls using L-brackets into studs for safety. Alternatively, stack crates on floors for freestanding shelf units. Organize contents using the cube storage method—rolled clothes, books stood vertically, shoes, folded items, or decorative baskets within crates for smaller items. The open design encourages maintaining organization since clutter is immediately visible. Paint crate interiors in contrasting colors for added interest, or line backs with patterned paper or fabric. This versatile storage costs $10-15 per crate, creating substantial, attractive storage that adapts as needs evolve.
20. Design a Hanging Clothing Rack for Extra Storage
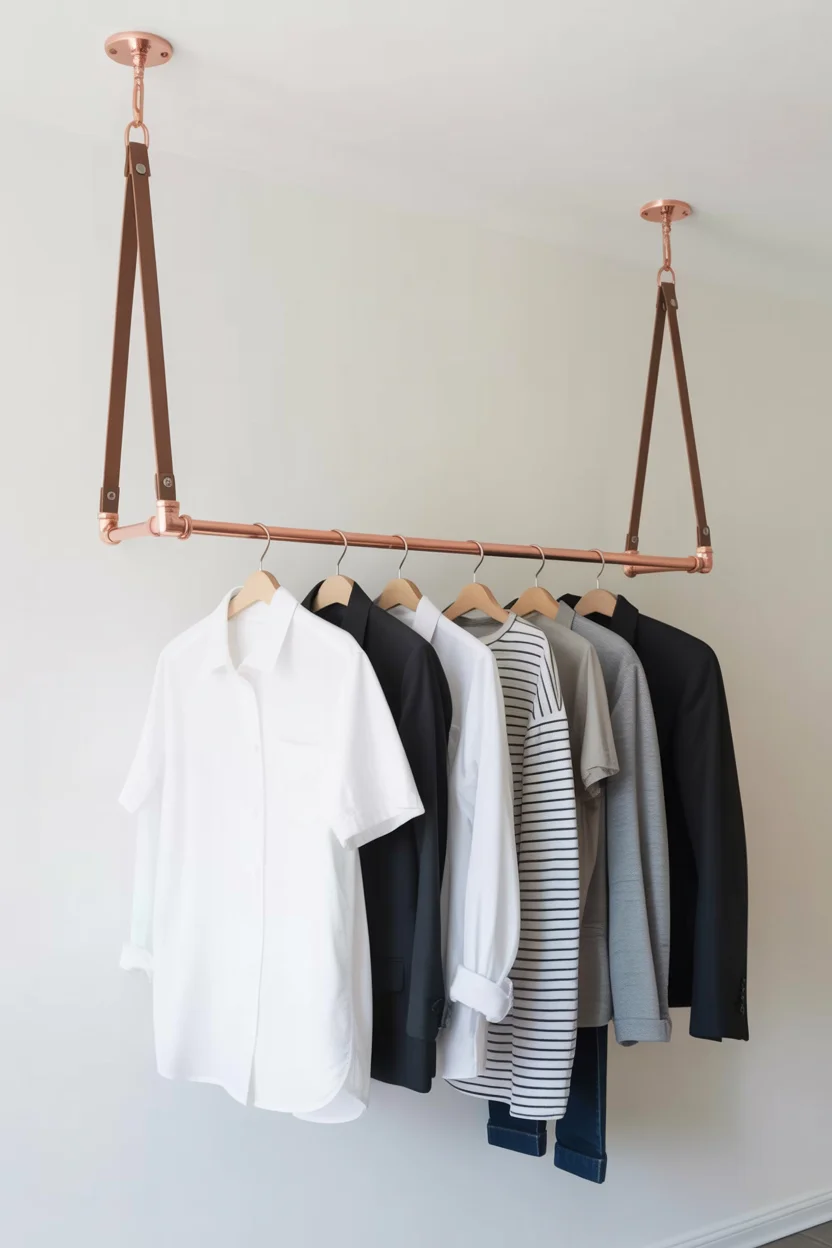
Hanging clothing racks add essential storage for wardrobes exceeding closet capacity while creating design features from displayed clothing. The ceiling-mounted approach preserves floor space unlike freestanding racks, crucial in small bedrooms where every inch counts. Displayed clothing—favorite pieces, planned outfits, or frequently worn items—remains accessible and wrinkle-free while adding color and visual interest. The industrial aesthetic of pipe or wood racks adds trendy design value, transforming necessary overflow storage into intentional décor rather than clutter acknowledgment.
Build hanging racks using copper or black iron pipe for the rod, suspended by rope, chain, or leather straps attached to ceiling hooks or eye bolts. Ensure ceiling attachments secure into joists or use heavy-duty anchors rated for weight. Position racks conveniently—over bed ends, in corners, or along blank walls—at heights allowing easy access (typically 65-75 inches from floor). Rod length depends on space and clothing quantity—4-6 feet accommodates substantial hanging without overwhelming rooms. Treat pipes with clear sealant if desired, or leave natural for industrial patina. Suspend using matching materials—natural rope for bohemian feels, chain for industrial edges, or leather straps for sophisticated looks. Curate displayed clothing thoughtfully—color coordinate for visual appeal, limit quantity to prevent overcrowding, or rotate weekly outfits. Add S-hooks for accessories or bags. The functional storage costs $30-60 while solving real closet overflow problems and contributing genuine design interest through the industrial hardware and colorful textiles.
21. Make a Custom Neon Sign With LED Strip Lights
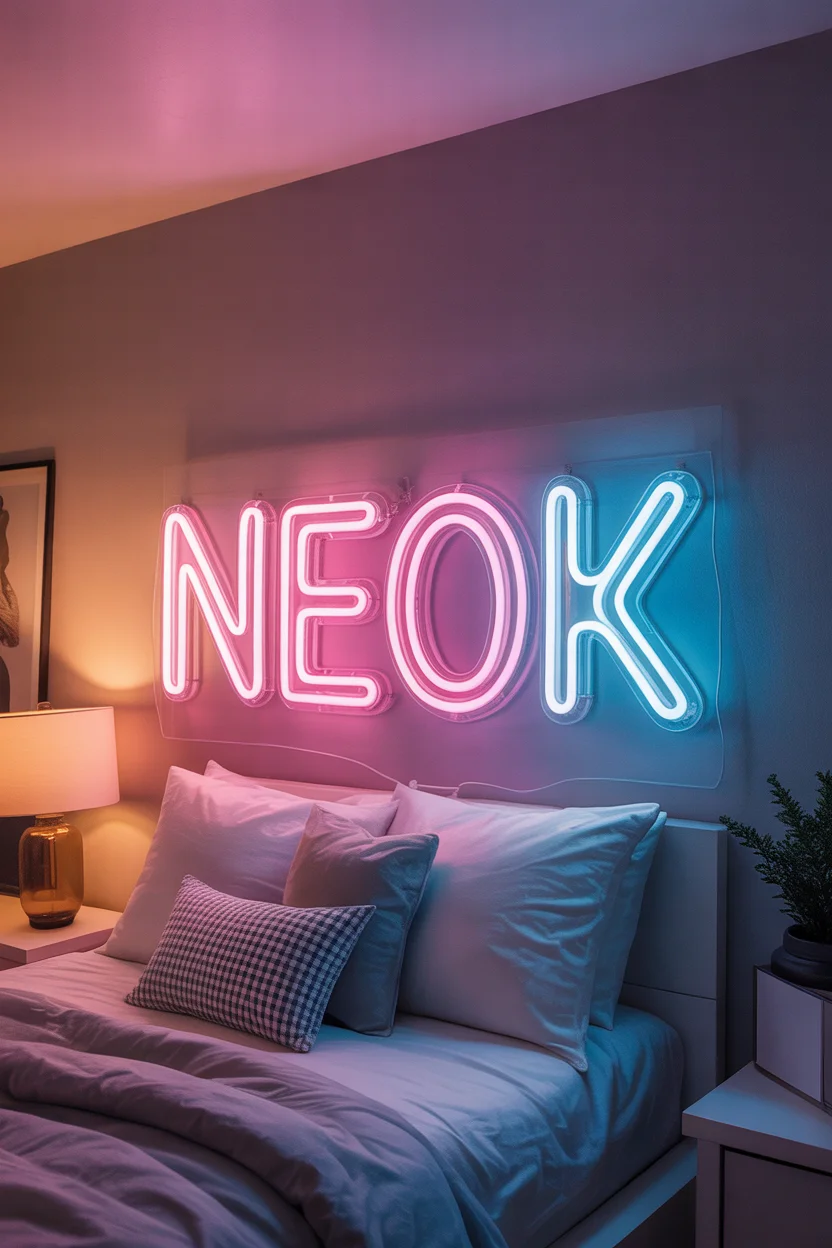
LED neon signs create the trendy, Instagram-worthy glow of traditional neon at affordable prices without heat, fragility, or professional installation requirements. The flexible LED strips bend into letters, shapes, or designs, then mount on walls or clear backing boards. Battery or plug-in options suit different placement needs, while remote controls allow color changes and dimming. The ambient glow provides perfect mood lighting for video calls, photos, or evening relaxation while making bold design statements. Teens love the customizable messages—inspirational quotes, names, favorite song lyrics, or simple shapes reflecting personality.
Create LED neon signs by sketching designs on paper to scale, planning letter or shape sizes appropriate to space—typically 12-24 inches for single words. Purchase neon-style LED strip lights with silicone tubing that bends around curves (specifically “neon flex” LED strips). Cut clear acrylic or plywood to backing size. Transfer design to backing, then carefully bend LED strips following lines, securing with clear mounting clips every 2-3 inches. Power requirements vary—battery-powered versions offer placement flexibility, plug-in provides reliable power. Hide power supplies behind furniture or use decorative cord covers. Mount finished signs using command strips or screws. Popular designs include single words like “Dream,” “Create,” or names, simple shapes like hearts or stars, or short phrases. Materials cost $25-60 depending on size and LED quality. The resulting sign rivals purchased neon costing $100-300 while allowing complete customization impossible with pre-made options.
22. Create a Chalkboard Wall for Ever-Changing Expression
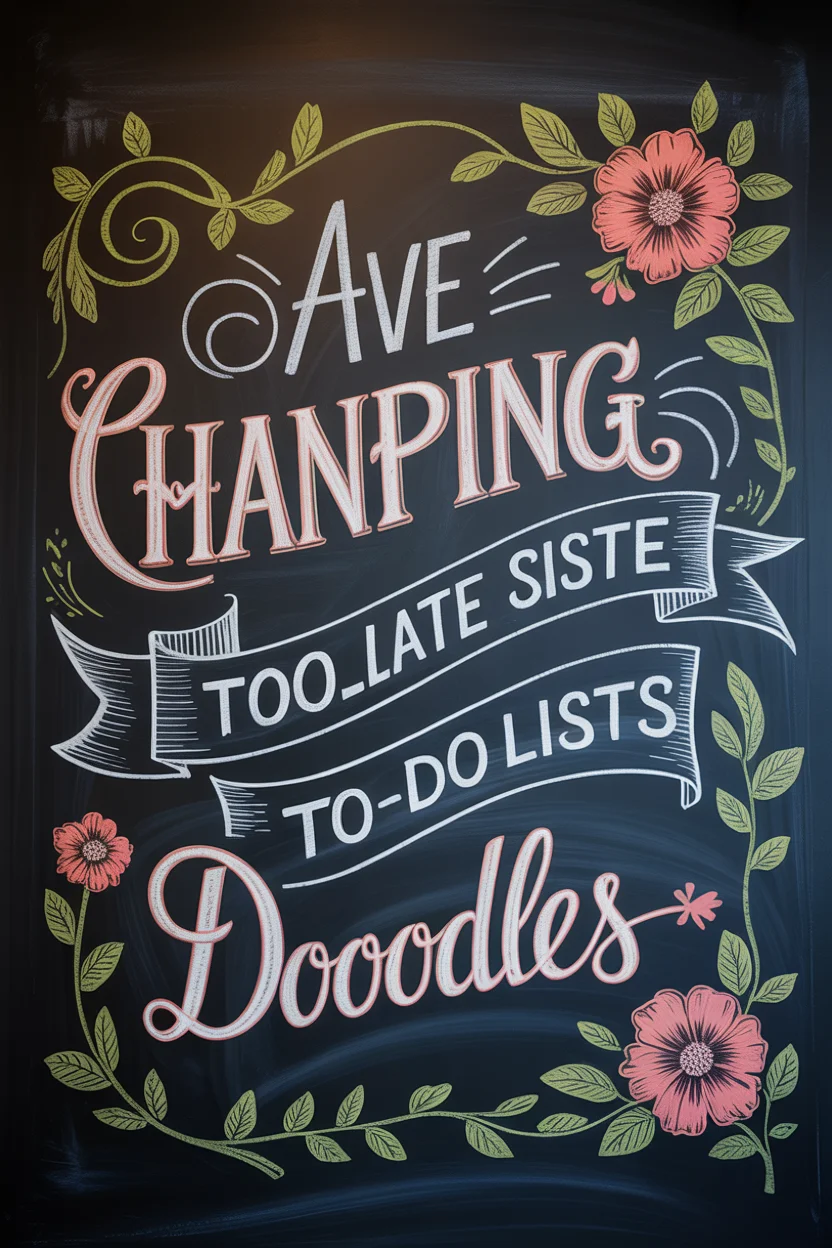
Chalkboard walls transform static bedroom surfaces into dynamic, interactive spaces for creativity, organization, and self-expression. The writable surface accommodates everything from inspirational quotes and artwork to monthly calendars, homework reminders, or random doodles. Unlike permanent wall art, chalk designs change daily, weekly, or seasonally, ensuring the room never feels stagnant. The matte black surface adds sophisticated contrast while serving genuine functional purposes—assignment tracking, outfit planning, or creative outlet. For teens whose interests and styles evolve rapidly, changeable wall treatments prove far more suitable than permanent décor.
Apply chalkboard paint to accent walls, sections of walls, or even furniture surfaces. Clean and prime walls following paint manufacturer directions. Apply 2-3 coats of chalkboard paint—available in traditional black or trendy colors like navy, sage, or gray. Allow proper curing time (typically 3 days) before first use. Condition the surface by rubbing chalk over the entire area and erasing. Stock chalk in various colors for creative options, plus a good eraser or damp cloth for changes. Create monthly calendars, weekly assignment lists, inspirational quote rotations, or large-scale artwork. Practice designs on paper first for complex illustrations. The beauty lies in impermanence—erase and restart whenever inspiration strikes. Consider adding narrow wooden ledges below chalkboard sections to hold chalk and erasers. This interactive wall treatment costs just $20-40 for paint and supplies while providing unlimited creative possibilities that static decorations never achieve.
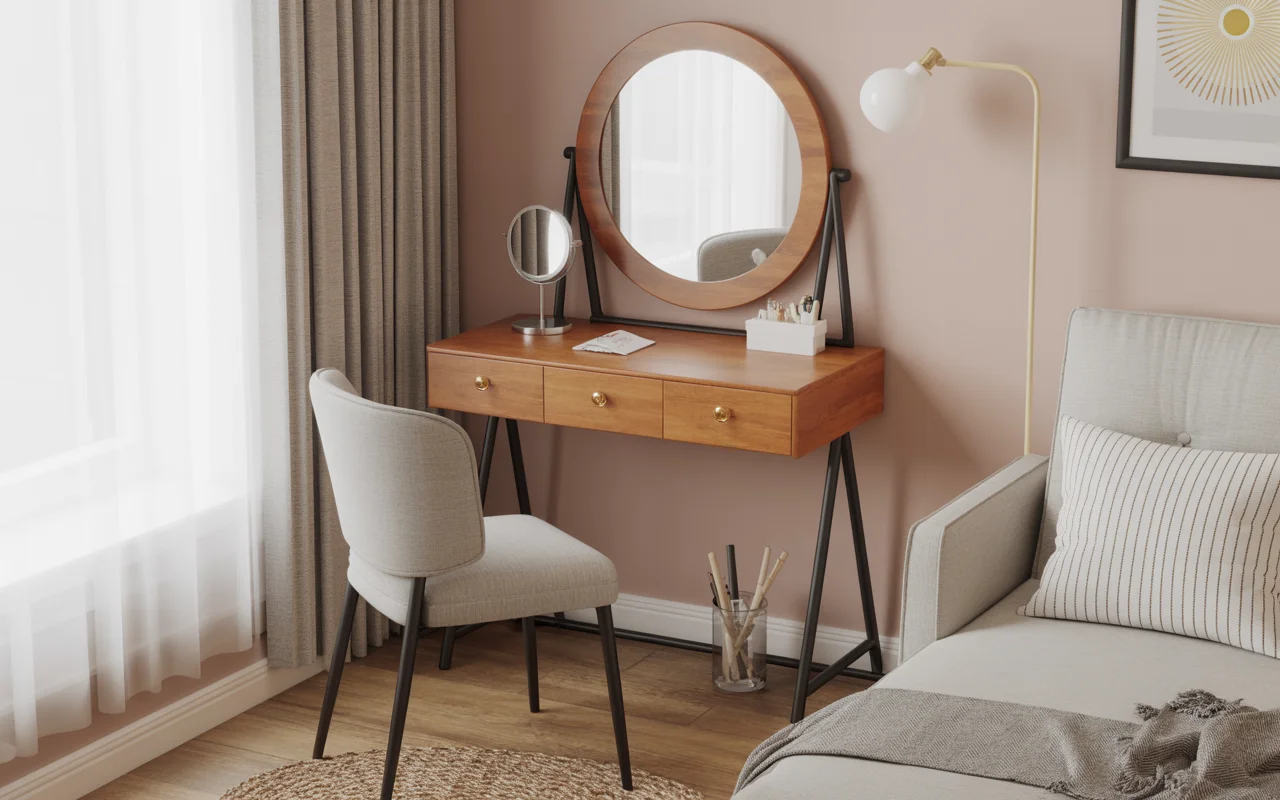
23. Build a Compact Vanity With Small Desk and Mirror
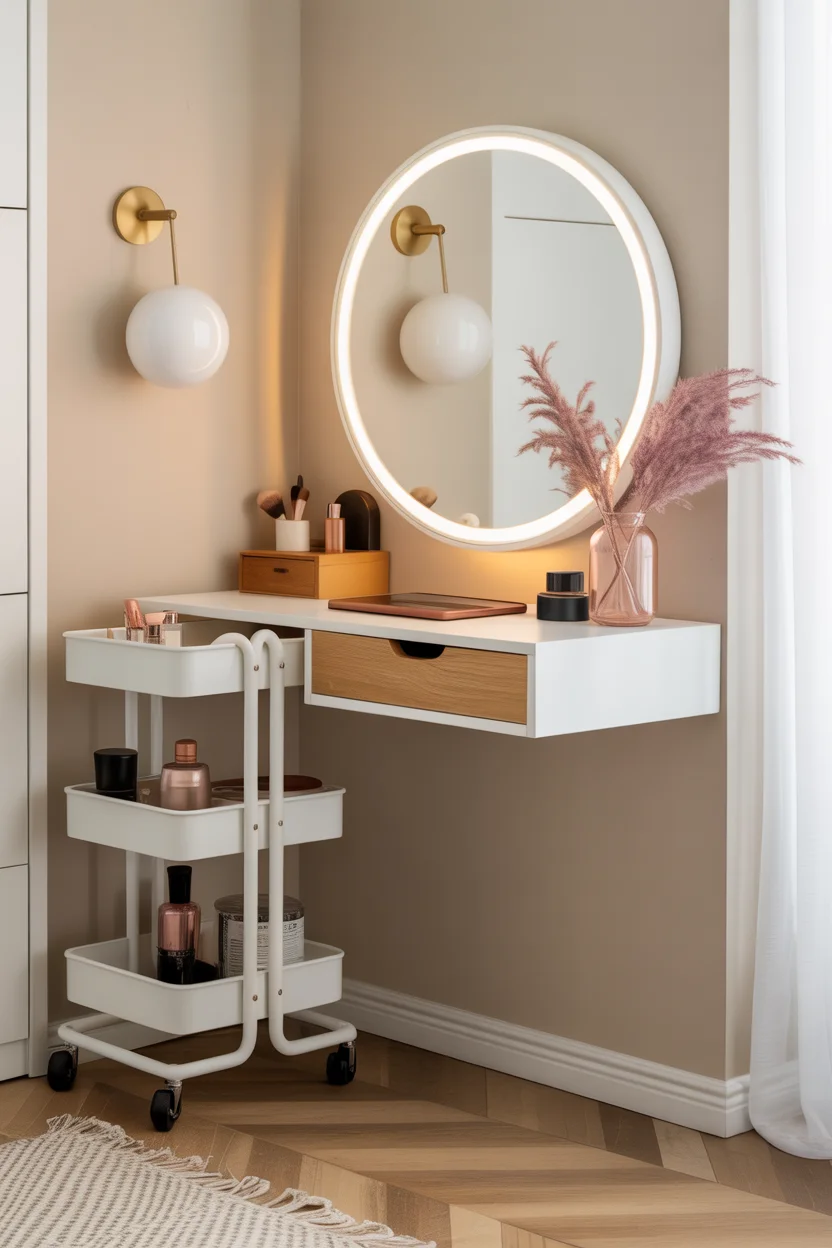
Vanity spaces for grooming and beauty routines feel essential to many teens but traditional vanity tables consume precious floor space in small bedrooms. Wall-mounted floating desk alternatives provide adequate surface area for daily essentials while preserving the open floor critical in compact rooms. Adding a mirror above and compact rolling storage beside creates fully functional vanity areas in minimal footprints. The streamlined approach provides everything needed—workspace, mirror, storage—without the bulk and space commitment of traditional furniture.
Install a small floating desk or shelf (24-36 inches wide, 10-12 inches deep) at standard desk height (28-30 inches) using heavy-duty brackets secured to studs. Mount a large mirror directly above—round, rectangular, or shaped versions—at appropriate height for seated use. Position a small rolling cart or wall-mounted organizers beside the desk for beauty product storage. Add adequate task lighting—clip lights, wall sconces, or a small lamp—ensuring proper illumination for makeup application. Keep desktop minimal: jewelry holder, small tray for daily products, tissue box. Store remaining products in adjacent cart or wall organizers. A simple stool or small chair tucks underneath when not in use. Consider a small pegboard above or beside the mirror for hanging tools and accessories. The complete compact vanity costs $60-100 while providing full functionality in perhaps one-third the space of traditional vanity furniture, essential in small teen bedrooms where multipurpose, efficient solutions make the difference between functional and cramped.
Conclusion
These teen bedroom DIY decor ideas prove that small spaces and limited budgets don’t restrict creative expression or functionality. From vertical storage solutions maximizing every inch to personalized wall treatments and custom furniture, hands-on projects transform basic bedrooms into styled, organized spaces reflecting individual personalities. The DIY approach empowers teens with valuable skills while creating rooms that genuinely feel like theirs. Start with one project, master the technique, then layer additional improvements over time, building dream bedrooms one affordable, achievable project at a time.

Join The Discussion